


Building the Business Model & Mapping Layer
The main purpose of the business model is to capture how users think about their business using their own business terms. The business model simplifies the physical schema and maps the users’ business terms to physical sources.
There are two main categories of logical tables: Fact and Dimension. Logical fact tables contain the measures of organization’s business operations and performance. Logical dimension tables contain the data used to qualify the facts.
A. Follow the instructions in case you closed the admin tool or else go to point
1) In order to define logical table structure in DW Business Model, you will
use Oracle BI Administration tool.
a) Select Start > Programs > Oracle Business Intelligence > BI
Administration.
b) Select File > Open > Offline.
c) Double-click SH.rpd to open the repository file.
d) Enter the following parameters:
User: Administrator
Password: Administrator
e) Click OK.
2) Create a Business Model by right clicking in the white space in the Business Model and Mapping layer and select New Business Model. In the name field, name the business model as DW and click OK. Alternatively, you could drag and drop the Physical schema to create the initial Business Model.

3) Create logical tables by right-clicking on DW business model and select New Object > Logical Table and name it Sales Fact in the Logical Table dialog box and click OK.

4) Create Logical column of Sales Fact table
a) In The Physical Layer expand SALES table.
b) Select and drag AMOUNT_SOLD column from the Physical layer to the Sales Fact logical table in the Business Model and Mapping layer. A new AMOUNT_SOLD logical column is added to the Sales Fact logical table.
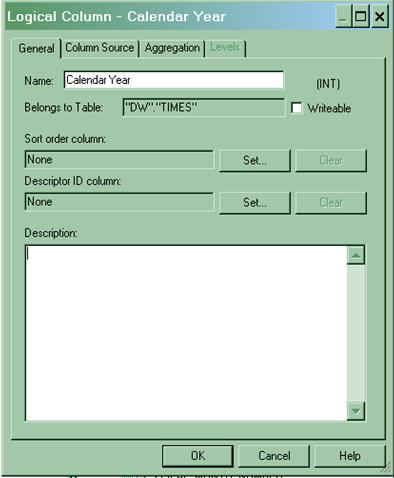
In the Business Model and Mapping layer, double-click AMOUNT_SOLD logical column to open the Logical Column dialog box.
c) Go to the General tab and in the Name field, rename the column to “Amount
Sold”
d) Click the Aggregation tab.
e) In the Default aggregation rule drop down list, select SUM.
Aggregation rule determines the aggregation type to be used in the SQL
query generated by OBI. For example, sum, avg, count etc.
f) Click OK to close the Logical Column dialog box. Notice that the logical column icon is changed to indicate an aggregation rule is applied.
g) Pull the QUANTITY_SOLD column from the SALES table to the Sales Fact
h) Add the aggregation rule as SUM for Quantity Sold logical column.
It should appear as like below

5) Create Dimensions in Business Model and Mapping Layer as follows :
a) Select the following tables in the Physical layer.
CHANNELS, TIMES, PRODUCTS, CUSTOMERS and PROMOTIONS
b) Drag the selected tables from the Physical layer onto the DW
business model folder in the Business Model and Mapping layer. This
automatically creates logical tables in the Business Model and
Mapping layer.

c) Right-click the DW business model and select Business Model
Diagram > Whole Diagram.
d) Place the Sales Fact table in the middle. To adjust the zoom
factor, right click on the empty space of diagram window and select
the zoom.

e) Click the New Join button in the toolbar.

f) Click on the PRODUCTS table icon first and then click on Sales Fact
table icon in the Logical Table Diagram. The Logical Join dialog box
opens. Leave the defaults as they are and click OK.

g) The join is creating a one-to-many (1:N) relationship that joins the
key column in the first table to a column that is a foreign key in the
second table. Create the joins and repeat the steps for the remaining
tables. You don’t have to specify any join conditions in Business
Model; BI server will pick the joins defined in the Physical Layer.
CHANNELS join with Sales Fact
CUSTOMERS join with Sales Fact
TIMES join with Sales Fact
PROMOTIONS join with Sales Fact
Observe and close Logical Table Diagram window.

6) Select File > Save to save the DW repository
7) Click NO to check global consistency.
8) Remain logged in to the Oracle BI Administration Tool for the next lab.
Rename Business Model
1) To change a column name manually, double click a column and change the name. For example change ‘CALENDAR YEAR’ to ‘Calendar Year’.
2) To automate column name changing, Click Tools > Utilities and from utility dialog box, click Rename Wizard and then Execute.


4) Click the Add Hierarchy button and click Next button.

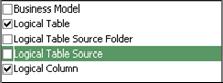
5) First check ONLY Logical Table and Logical Column and click Next.
6) Select All text lowercase and click Add.
7) Click Change each occurrence of ‘_’ into a space and click Add.
8) Click First letter capital and click Add.
Similarly add other rules as per the screenshot. The order of the selected rules is very important, it should appear as shown in next screenshot.

9) Click next and click Finish and verify that logical tables and logical columns in the Business Model and Mapping layer are renamed as per rules.
10) The Logical Table names needs to be renamed further. It can be done manually > right click the logical table > select the Rename option.

11) After renaming, the logical tables it should appear as :

Deleting Unnecessary Business Objects
1) Expand Channels logical table in the Business Model and Mapping layer. Use Ctrl + click to select the ID columns except Channel ID(we have to retain the primary key always).
2) Press Delete key from keyboard or Right-click either of the selected columns and select Delete.
3) Click Yes to confirm delete.
4) Verify that the Channels logical table now has only three logical columns.
5) Repeat the steps to delete the ‘ID’ logical columns from the following tables
a) Customers
b) Products
c) Promotions
d) Times
Note: If you choose ‘ctrl’ button to select multiple object make sure the Logical Table is not highlighted.
6) Save the repository. Do not check global consistency.
Do you like this article? Share It!


Post a Comment